Conjugarte Drawing: A Practical Guide
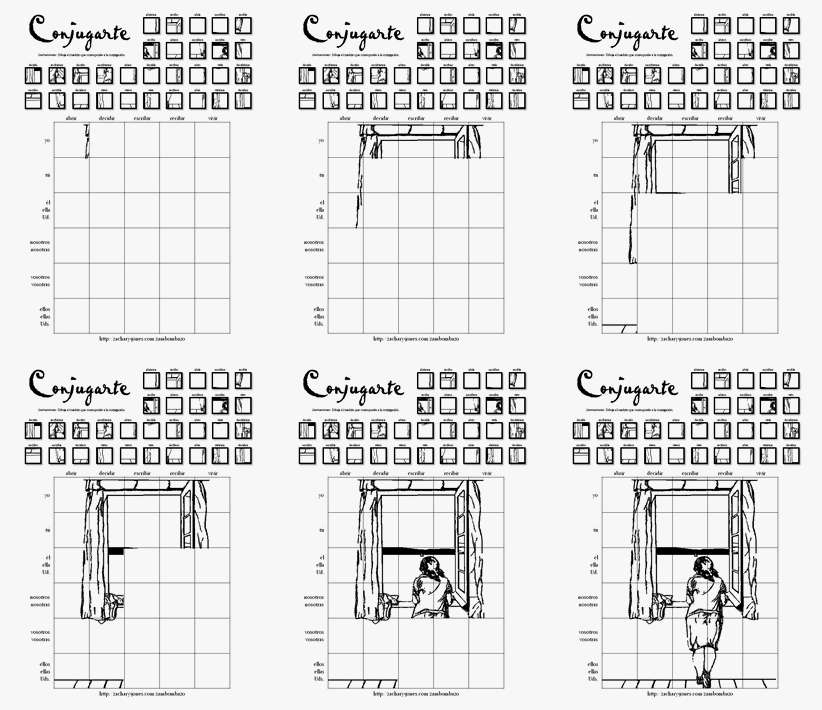
If you have come across the term conjugarte drawing and wondered whether it is a software program, a movement, or a brand of pencils, you are not alone. Conjugarte drawing is a creative practice that borrows the structural idea of conjugation from grammar and applies it to visual composition. Instead of treating a drawing as one fixed image, the artist works through a series of linked states, the way a verb moves through tenses. Each state shares core elements with the others while changing a specific variable: angle, weight, palette, or rhythm.

This guide explains what conjugarte drawing is, where the term comes from, the tools you need, and a step-by-step method you can use on your first piece. It is written for self-taught artists, hobbyists, and design students who want a repeatable workflow that pushes past single-image thinking.
What Is Conjugarte Drawing?
Conjugarte drawing is a method, not a style. The name comes from a playful blend of the words conjugate and art. The core principle is simple: one subject is drawn multiple times in a controlled sequence so that one variable changes between each version. The sequence, called a conjugation set, behaves like a visual sentence. The subject stays consistent, the variable acts like the verb ending, and the viewer reads change over time.
Artists use the method to study form, light, gesture, or color. It is also popular as a journaling practice because each conjugation reads as a small entry that belongs to a larger series.
The Core Idea: One Subject, One Variable
Pick a subject. Pick one variable. Draw the subject five to ten times while adjusting only that variable. Common variables include:
- Angle: rotate the subject in 15 or 30 degree steps.
- Light direction: move a virtual lamp and re-cast the shadows.
- Line weight: shift from hairline to heavy contour across the series.
- Palette: lock the value structure and only swap hue families.
- Gesture tension: redraw the same pose with calm, then energetic marks.
The discipline of changing one thing at a time is what gives the series its grammar. Without that rule, you are just drawing a collection of unrelated sketches.
Conjugation Set vs. Study Sheet
A traditional study sheet crams many references onto one page. A conjugation set is different. It is a deliberate series where each frame refers back to the last. Think of it like frames in a film strip rather than a mood board.
Where the Practice Comes From
Conjugarte drawing sits at the intersection of three older habits:
- Old master copies: academies asked students to repeat a master drawing with small shifts in tone or line to internalize technique.
- Animation model sheets: character artists draw a character in multiple poses so animators can keep proportions consistent across scenes.
- Typographic exercise books: lettering students repeat a letterform with systematic changes to train the eye.
Conjugarte drawing formalizes these habits. It gives the series a name, a rule, and a reading order. That small structure is what separates it from a random sketch dump on the same page.
Tools You Need to Start
You do not need much. The point of the method is to focus your attention, not to upgrade your kit.
- Paper: a sketchbook with smooth paper for pencil, or a pad with a slight tooth for ink. A4 or 9x12 inches is a comfortable size.
- Pencil or pen: one tool you already control. A 2B pencil and a 0.5 mm fineliner are a strong pair.
- Eraser: a soft kneaded eraser for pencil, a vinyl eraser for ink corrections.
- Ruler or triangle: optional, but useful if your variable is angle.
- Reference: a photo, a still life setup, or a 3D model. Pick one and stick with it for the whole set.
Digital artists can use the same method in Procreate, Krita, or Photoshop with a single layer group per frame. Keep the brush the same across the set so the variable stays the focus.
Step-by-Step: Your First Conjugation Set
The following workflow takes about 45 to 90 minutes. It is designed so a beginner can finish in one sitting.
Step 1. Lock the Subject
Choose a subject simple enough to draw repeatedly without losing patience. A mug, a hand, a pear, a single houseplant, or your own shoe are all strong picks. Avoid complex scenes for your first attempt. The point is repetition, not storytelling.
Step 2. Choose One Variable
Pick the single thing you will change. Light direction is the most forgiving for beginners because you can clearly see the cast shadow shift frame by frame. Angle is the most analytical. Line weight is the most expressive.
Step 3. Define the Steps
Decide how many frames and how big each change is. Six frames at 30-degree rotation is a clean start. Four frames at four line weights is faster. Write the steps in the margin before you draw so you commit to the plan.
Step 4. Block the First Frame
Lightly block in the proportions of frame one. Spend more time than usual on this frame because it sets the grammar for the rest. Measure twice, draw once, in the literal sense.
Step 5. Render and Adjust Only the Variable
Finish frame one to a level you are happy with. Then, for frame two, keep the proportions identical and only adjust your chosen variable. Repeat through every frame. Resist the urge to fix unrelated details. Those fixes belong in a different study.

Step 6. Read the Series
Lay the frames out in order and read them like a sentence. Does the change feel even? Is there a clear rhythm? If one frame looks out of place, redraw it rather than tweaking the others. Consistency of method is more important than perfection in any single frame.
Step 7. Annotate
Under each frame, write the variable value. For example: light 30 degrees left, 45 degrees left, 60 degrees left. The annotation turns the page from a drawing into a reference you can return to.
Common Mistakes and How to Avoid Them
Most beginners break the same rules. Watch for these.
- Changing more than one variable: the moment you tweak two things at once, the series stops reading as a conjugation. Note the variable in the margin and protect it.
- Skipping the annotation: without labels, the series looks like random sketches. The labels are the grammar.
- Drawing too small: small frames hide errors and limit the lessons you can extract. Aim for at least 10x10 centimeters per frame.
- Choosing a subject with hidden complexity: detailed folds, reflective surfaces, or intricate hair will pull attention away from the variable. Save them for later sets.
How Conjugarte Drawing Improves Specific Skills
The method is not just an exercise. Each variable trains a different skill, which makes conjugarte drawing a versatile practice.
Form and Construction
Rotating the subject around a fixed axis forces you to understand volume. You stop drawing symbols and start drawing structure because the rotation exposes gaps in your mental model.
Light and Value
Locking everything except the light direction trains your eye to read the form from shadow alone. After two or three sets, value studies become faster and more accurate.
Line Quality
Sweeping through line weights from hairline to heavy contour teaches control of pressure and tool speed. This is the variable that most directly improves inking confidence.
Color and Palette
Conjugating hue while locking value is one of the fastest ways to build a color vocabulary. You begin to see that blue-orange, green-red, and yellow-violet are siblings, not strangers.
Adapting the Method Digitally
Digital tools make the method easier to manage because you can duplicate a base layer and mask changes to the variable only. A simple setup in most apps:
- Draw the base subject on its own layer.
- Duplicate the layer once per frame.
- Adjust only the variable on each duplicate.
- Stack the frames in a single canvas or export them side by side.
Keep the brush, canvas size, and zoom level identical across frames. The point of the method is to isolate a variable, and digital shortcuts can quietly smuggle in extra changes.
Building a Personal Practice
Once you have finished three or four sets, the habit starts to feel natural. From there, a simple weekly rhythm works well:
- Week 1: subject rotation, six angles.
- Week 2: light study, four light directions on the same object.
- Week 3: line weight study, five weights on the same contour drawing.
- Week 4: palette study, five color schemes on the same value structure.
At the end of the month, lay the four sets side by side. The variety will surprise you, and the shared structure will keep the work coherent. That mix of variety and structure is what makes conjugarte drawing a real practice rather than a one-off exercise.
Where to Share and Find Inspiration
Conjugation sets photograph well because they read clearly even at thumbnail size. They are popular on portfolio sites, art forums, and social platforms where process matters. When posting, include the variable name, the number of frames, and a short note on what you learned. That context turns a finished page into a teaching tool and invites useful feedback from other practitioners.
Final Thoughts
Conjugarte drawing is a quiet, structured practice. It rewards patience and consistency over flash. If you commit to one variable, finish the set, and annotate the result, you will finish with something you can return to and learn from, which is rarer than it sounds. Start with a single mug, six rotations, and a 2B pencil. The grammar of the page will do the rest.